Her only request was for something "valentin-ey" which you would think would be simple, but I don't do anything simple. I didn't want to just settle for some basic sprinkles or a pressed sugar topper. Since the recipients are a bunch of 14 year olds, I wanted something young and hip (do the kids today still say hip?) and when I think "young and hip" I think "hot pink sparkles."

Yeah. That just happened.
As I mentioned, I started with my favorite Red Velvet Recipe. I originally got this recipe when I was looking for Green Velvet Cupcakes from the amazing Bakerella and since I get so many compliments on it, I've never even considered changing it up. In fact, I use this recipe a lot. I've altered the color, taken out the cocoa, replaced the oil with butter, etc. It is just a really great basic cake recipe. And, it doesn't require a mixer which is made of win in my book.
I start by combining the flour, sugar, cocoa, salt and baking soda in a bowl and whisking them together.

I set that aside and then I add the oil, eggs, vanilla, vinegar and red food coloring to the buttermilk (or in my case 1tbsp vinegar mixed with skim milk and left to sit on the counter for a few minutes)


Once the wet ingredients are all mixed together, I add them to the dry ingredients and whisk until they are just barely combined.

In an effort to make all the cupcakes uniform, I like to use an ice cream scoop. It took me quite a while to find the ultimate cupcake scooper. I knew I needed an ice cream scoop that had the little scraper device and I knew I needed it to be about 1/4 cup in volume. I also knew I didn't want to spend the $20 that the bake shop near me was asking or a "cupcake scoop". I just flat out refused. Even the $12 I'd seen them selling for at Bed, Bath and Beyond was a little rich for my blood. And then one day I found this little beauty at the ice cream shop near my old office for $1.50! What?!? Excellent. For that price, I bought two! It may be a little smaller than 1/4 cup, but it was close enough for me. If you don't have an ice scream scoop, a 1/4 cup measuring cup will work just fine, but you may have to scrape the batter out a little.

Now put these in the oven at 350 degrees for 17 - 20 minutes. Red Velvet, like chocolate, tends to burn and/or dry out if it goes too long in the oven so I'd start checking around the 17 minute mark. Also, if your oven is like mine and tends to run a little cool, you can pre-heat your oven to 400, and then knock it back to 350 right before you put the cupcakes in. That way they will be sure to be nice and round on top since that hit of heat is what makes the baking soda activate. Look at that, I just used my science degree. It's about damn time I used that thing for something.
After you remove the cupcakes, let them cool completely and then it is time to frost!
Start with a stick of room temperature butter (regular salted stuff) in your mixer with a paddle attachment. Give it a quick mix just to break it up a bit and then add the cream cheese (full fat is a must. Trust me, it is a chemical thing. See, science again!) Give that a quick whirl and then add the vanilla bean paste - if you don't have any that is fine, you can use vanilla extract, but if you are going to make more than one batch of this frosting, it would be totally worth it to buy a small jar of the paste. It lasts a really long time and it makes a real difference in the taste of the frosting. Also add in the powdered sugar and then, finally, the milk. Add less milk if you want a stiffer frosting. Give the mixture a quick stir on low, just until all the sugar incorporates and then kick it up to medium high for about 5 minutes until you have a bowl full of them most delicious cream cheese frosting ever made - if I do say so myself.


Now for this particular design, I decided I wanted, in addition to the pink sparkles, for the frosting itself to be pink, so I broke out my pink gel color and added a small drop. Remember, you can always make it darker, it's really hard to make it lighter so start small.

Once the frosting was my desired color of pink, I used a frosting bag with no tip, I just cut it at a nice wide-ish place. I was going for more of a flat frosting and I definitely could have just spread the frosting on the cupcakes with a knife, but I wanted the edges to be even and round, hence the bag. Just hold the bag straight up and apply pressure, the blob will spread nice and evenly for a nice flat circle.

Next, I made some simple little stencils out of parchment paper and a little cookie cutter. I decided I wanted both a positive and a negative impression which worked out really nicely because that meant, each heart I cut out was actually two stencils. At first I hoped that I'd be able to use just one stencil over and over again and if I'd made them out of something more durable and maybe sprayed them with cooking spray first that may have worked. But, I didn't. It also probably would have been smart to get myself a shape punch and make my life a whole lost easier. But, I didn't. What can I say, I'm a glutton for punishment.
Regardless, once the shapes were cut out, I positioned them on the cupcakes and applied a little pressure just to make sure there were no gaps.

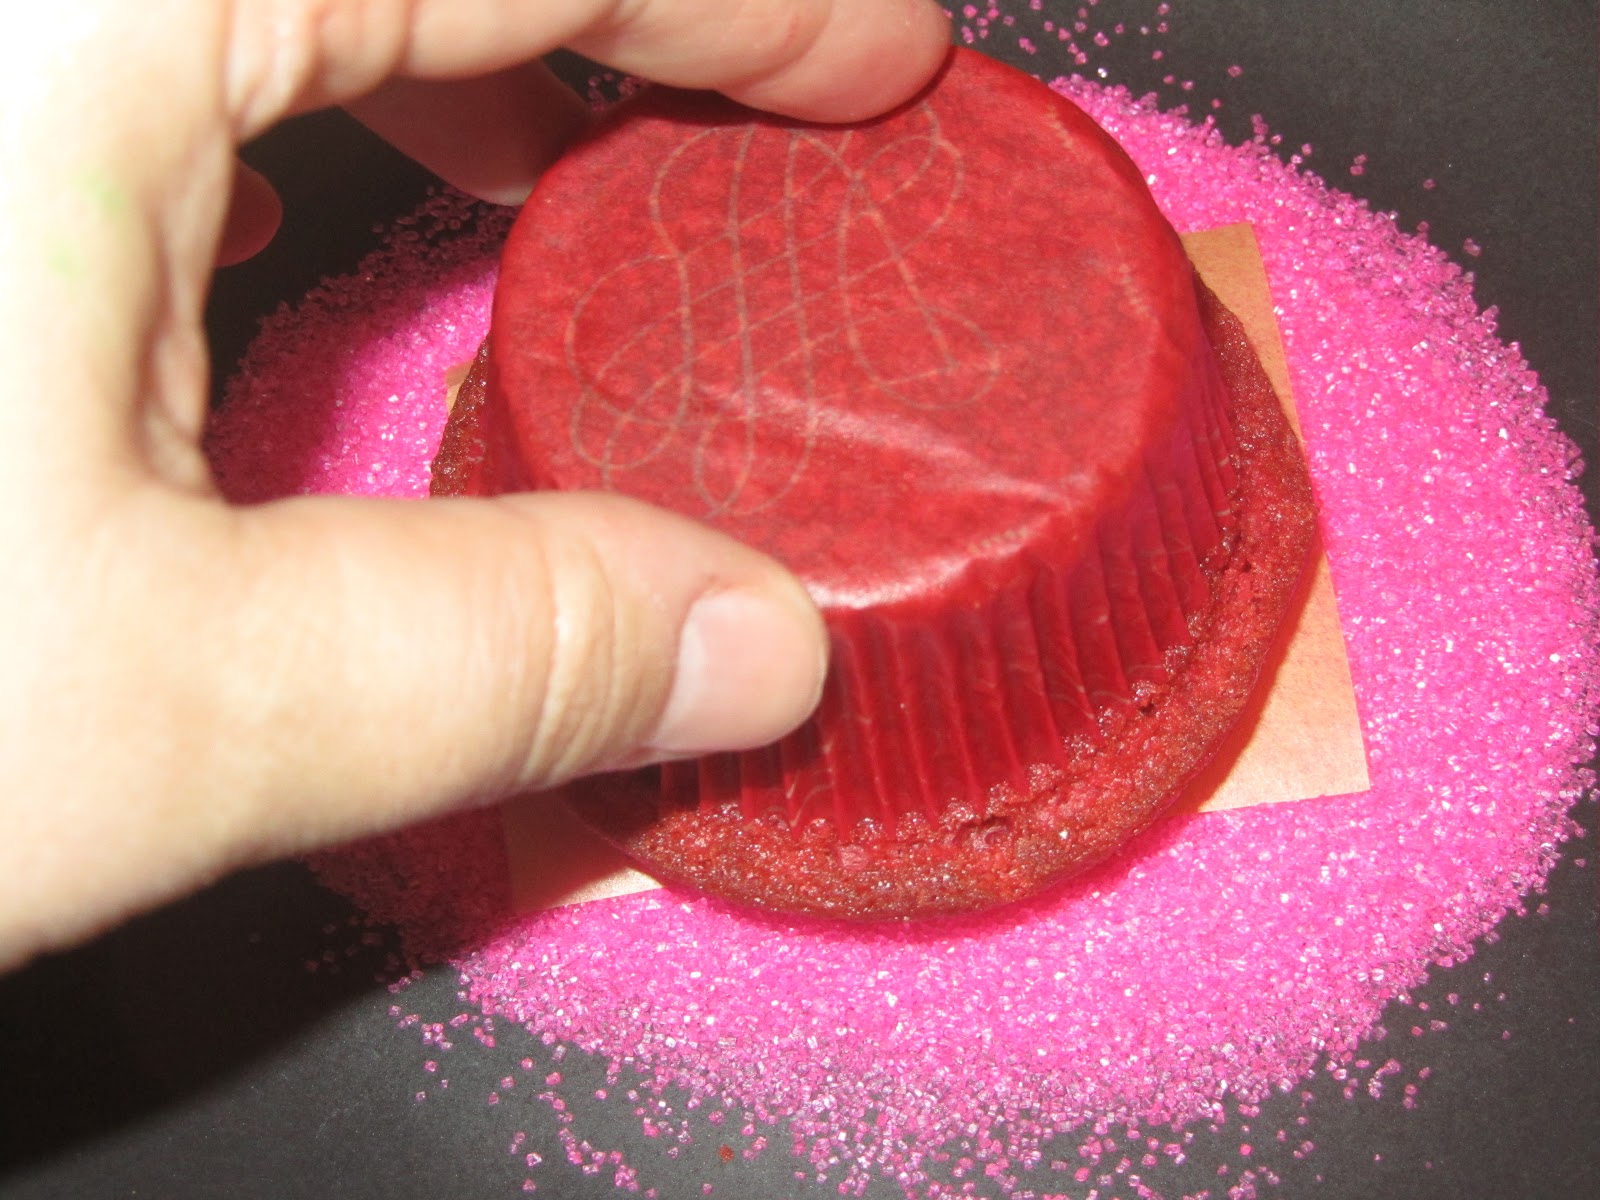
Then I took each cupcake and dipped it straight down into a plate full of the sparkling sugar.
Finally, I very gently removed the parchment paper (I also used a toothpick to smooth out any lumps or stray sparkles) and voila, super cute modern but classic Valentine's Cupcakes!

These are so simple, you could whip up a batch for some one special today!

Or since, today is Valentine's Day, and you probably already made whatever treats you're going to make, you could easily change up the color pallet and the shape and make a fun treat for any occasion.
Shopping List for Melly's Favorite Red Velvet Cupcakes (makes 24 cupcakes)
- 2 1/2 Cups All Purpose Flour
- 2 Cups Sugar
- 1 Heaping Tbsp Cocoa Powder
- 1 Tsp Salt
- 1 Tsp Baking Soda
- 1 Cup Buttermilk
- 1 Cup Vegetable Oil
- 2 Large Eggs
- 1 Tsp Vanilla
- 1 Tbsp Vinegar
- 1 Tsp Red Gel Food Coloring
Shopping List for Melly's Favorite Cream Cheese Frosting
- 1 Stick Salted Butter
- 1 8oz Package of Full Fat Cream Cheese
- 1 Tsp Vanilla Bean Paste
- 4 Cups Powdered Sugar
- 1 Tbsp of Milk
Happy Valentine's Day!
This comment has been removed by the author.
ReplyDeleteI want cupcakes now... BTW have you tried the tasteless red food coloring from Wilton? I think I like it for my Red Velvet desserts...
ReplyDeleteI haven't really had a problem with this food coloring (Chefmaster - Liquid/Gel Color) tasting bad - at least not in baked applications. For frostings or icings though, I use the Americolor Super Red which does a good job of not having a bad taste since you don't need to use as much.
Delete