Well, far be it from me to disappoint him.
I decided to go with the classic chocolate and vanilla, but to pump them up with delicious fillings.
Chocolate Cupcakes
I started with The Pioneer Woman's Best Chocolate Cake. - yields 24 cupcakes
- 4 Tablespoons of unsweetened cocoa powder
- 2 Sticks of butter
- 1 cups boiling water
- 2 cups all purpose flour
- 2 cups sugar
- 1/4 teaspoon of salt
- 1 teaspoon baking soda
- 1/2 cup buttermilk
- 2 large eggs
- 1 teaspoon vanilla
Start by preheating the oven to 350 degrees and line your cupcake tin. I got these super cute red gingham liners at a local baking supply store and then lined those with white liners so that the brown from the chocolate wouldn't block out the design.
Next, melt the butter on medium heat and mix in the cocoa.
When the butter is all melted, add in the 1 cup of boiling water. I did some double duty here and had a pot of water coming to a boil to make dinner so I just borrowed some from that pot. Stir the water in and let the mixture come back to a boil before taking it off the heat.
While the chocolate/butter mixture cools a little, stir together the dry ingredients (flour, sugar, baking soda and salt).
Add the chocolate mixture to the dry ingredients. The chocolate doesn't have to be super cool for this step.
While the new hybrid chocolate/flour mixture is continuing to cool, mix together the buttermilk*, eggs and vanilla.
*I am lucky that the grocery store near me stocks buttermilk. But I am unlucky in that I am not the best planner and tend to assume I have buttermilk in my fridge when I don't. In this case (or if you can't find buttermilk) I have made buttermilk in a pinch. It is much easier then it sounds. Just take a measuring cup and add 1 tablespoon of white vinegar, then add skim milk to bring the total to 1 cup. Give this a quick whisk and set it aside for 5 minutes or so. Voila! You have just made buttermilk. No churning required.
Back to the cake.
Give your chocolate/flour mixture a quick stir and make sure it is not still super hot - you don't want to scramble your eggs.
Add in the buttermilk/egg mixture and stir it just until combined.
Pour 1/4 cup of batter in to each cup and pop it in the oven.
I cannot express how quick and easy this cake batter is. Remember that pot of water earlier, I literally made this cake while I was making dinner. What is best of all is that it doesn't require a mixer. Just a pot, a bowl and a measuring cup. I'm not Ina Garten, the less utensils I need for a recipe, the happier I am.
20 minutes later, you will have perfectly springy, fluffy, moist chocolate cupcakes. From here the possibilities are endless.
I decided to fill these cupcakes with Bake @ 350's Hostess Style Cupcake Filling:
(I made a few modifications for the limits of my fridge and pantry)
- 4 Tablespoons (1/2 a stick) of salted butter - she calls for unsalted, I refuse to stock unsalted in my fridge
- 1 cup of Powdered Sugar
- 2 teaspoons vanilla extract
- 3 Tablespoons skim milk - she calls for heavy whipping cream, I forgot to pick that up from the store
- 1 cup marshmallow creme
Start by creaming the butter
Add in 1/2 a cup of powdered sugar. At this point the mixture will look kind of grainy.
Add the vanilla and 1 Tablespoon of the milk (or cream if you are an organized shopper unlike me) and mix until smooth.
Mix in the rest of the sugar and the milk.
Finally add in the marshmallow creme. This stuff is sticky as all get out, so it was the perfect excuse to use my measuring cup slider.
Mix again until well incorporated and you are all set.
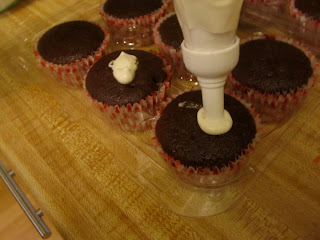
To fill the cupcakes, just put the cream into a pastry bag fitted with a star tip, press the tip into the top of the middle of the cupcake and squeeze for a bit. Don't worry about overflow, because this will all be covered with frosting.
Vanilla Cupcakes
For the yellow cake, I used my go-to recipe. I honestly have no idea where I got this recipe from anymore. I found it a few months ago while on a hunt for the perfect yellow cake recipe. I knew it couldn't require ingredients like cake flour or unsalted butter and - after the success of the chocolate cake and my red (or green) velvet cake - I wanted it to include buttermilk. I believe I searched for "yellow cake + buttermilk" in google and eventually found this recipe.
I have to apologize, I was literally doing three things at once while baking these up so I completely forgot to take pictures during the mixing. What can I say? I was a blond for four years. BUT! I am making this recipe again this week for another project, so I promise I will deliver detailed, step by step pictures soon.
Melly's Favorite Yellow Cake Recipe - yields 36 cupcakes
- 2 sticks of butter at room temperature
- 2 cups of sugar
- 3 eggs
- 1 1/2 teaspoons vanilla extract
- 3 3/4 cups all purpose flour
- 2 1/2 teaspoons baking soda
- 2 1/4 teaspoons baking powder
- 2 1/2 cups buttermilk
Start by heating your oven to 350 degrees and lining your cupcake tin.
With the paddle attachment on your mixer, cream together the butter and sugar.
While that is working, sift together the rest of the dry ingredients. I am not one to advocate for extra steps or tools, so sifting is something I have been known to skip. But in this case, I've noticed a difference in the results when I don't sift. So, if you can, do it. But if not, it'll still be tasty, just maybe not as evenly fluffy.
Add in the eggs one at a time and the vanilla.
Once those are all incorporated, alternate adding the flour mix and the buttermilk. I usually do 4 batches of flour mix and 3 batches of buttermilk. Wait until the most recent addition is fully mixed in before adding the next.
Before adding the last batch of flour, scrape down the bowl and add in the remaining bits.
Stir the batter only until it is all combined. You don't want to over mix.
This is a very sticky batter, so I have found that the best tool to use for scooping out the 1/4 cup of batter into each cup is an ice cream scoop. The kind with the thumb press and little scraper attachment. I have seen these sold at baking supply stores for over $20. Bed Bath and Beyond sells one for about $10. I found this little beauty at an ice cream shop for $1.50. It is actually a little under 1/4 cup, but for $1.50 I can go back through and add a little dollop of batter on top of the scoop. Or settle for slightly under filled cups.
20 - 23 minutes later (start checking at about 20 minutes, if a toothpick doesn't come out clean, leave them in for a few more minutes. You also want there to be a tinge of golden brown along the edges) you will have 36 pieces of spongy, buttery, deliciousness.
I love the combination of yellow cake and strawberry. So for a filling, this was a no brainer. I chose a super delicious strawberry jam that we get at our local Amish market. Any jam will work, just avoid ones with seeds or big clumps of fruit as they will get stuck in the piping tip.
Same way you did with the cream filling, use a piping bag and a star tip inserted into the top of the cupcake and squeeze out a bit.
Frosting
For both cupcakes, I decided to use the same frosting. I discovered this frosting on Tasty Kitchen a while back. It is a cooked frosting and calls for some really weird ingredients for a frosting - flour? granulated sugar?? But in the end, it taste and feels just like a delicious sweetened whipped cream. Everyone who tastes it exclaims about how good and light it is.
I like to do a fancy swirl of frosting on my cupcakes, and I've found that the original recipe is not enough to do that, so I doubled it.
Cooked Frosting from Tasty Kitchen - These ratios yield enough frosting to cover 36 cupcakes
(I also fancied it up with some vanilla bean)
- 10 Tablespoons Flour
- 2 Cups Milk
- 1 teaspoon vanilla bean paste
- 2 teaspoons vanilla extract
- 2 cups butter
- 2 cups granulated sugar (NOT powdered)
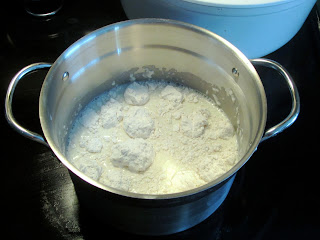
Begin by mixing the flour and the milk and putting them in a pot over medium heat.
Make sure to keep stirring while it cooks, you don't want it to clump or scorch.
Once the mixture thickens to a nice paste consistency, take it off the heat and let it cool.
Add the vanilla while the mixture cools and stir it well.
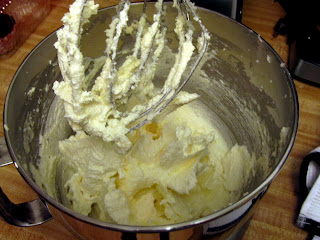
While that is cooling, whip the butter and the sugar together with your whisk attachment of your mixer. I employ a set it and forget it mentality with this. I put the mixer on medium-high, set the timer for 5 minutes and walk away.
After 5 minutes, scrape down the sides and inside the whisk attachment and whip again for another 3-5 minutes.
Next, add the cooled flour mixture and whip it for a minute or so.
You want the final consistency to look like whipped cream.
I use a super large smooth tip and cover the cupcakes in a swirl by starting on the outside, making a full circle and then moving up and in. I usually do about 3 circles. I found this video from My Baking Addiction to be a huge help.
Once all the cupcakes were frosted, I topped them with my farm animal cookies I made last week.
And they were a huge success!


No comments:
Post a Comment